If you have purchased Elementor Pro for your wordpress website, in most cases, there’s no need to install or purchase any other Contact Form plugins. This will reduce your server load and money of course because for larger websites, paid plugins can raise the project expense.
To store the User Submitted data, you just need to integrate an API in Elementor to send the form data to an email marketing service provider like MailChimp and many more.
And most importantly to track those user interactions in your website, connecting with Google Analytics (GA) and Google Tag Manager (GTM) can be implemented as well if you follow this step by step Guide.
Connecting MailChimp API with Elementor Pro:
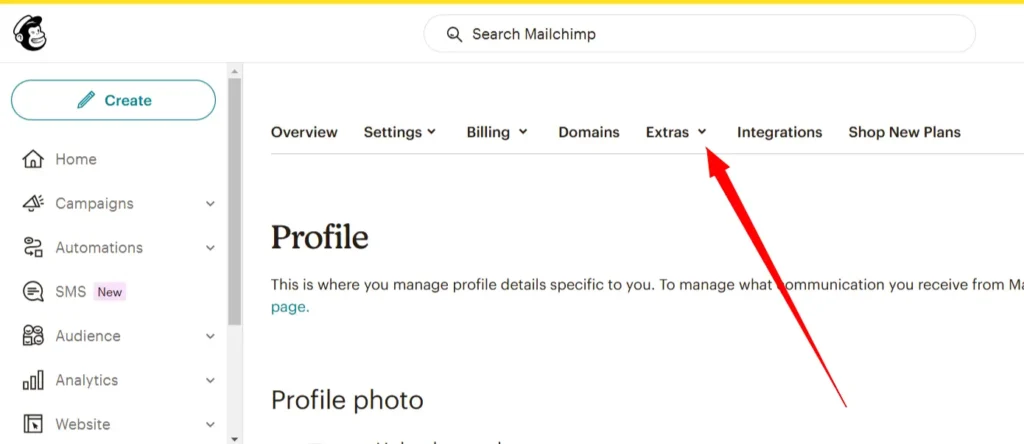
Go to your MailChimp account and click on your profile from that page find the menu named Extra where you will be able to create API token for different services.
Make sure you keep a note as Elementor so that in future you will be able to see which API was used for Elementor.
Copy the API token provided by your MailChimp account and go to your WordPress backend. As you are an Elementor Pro user you will find the Integrations options in the Settings tab of Elementor menu.
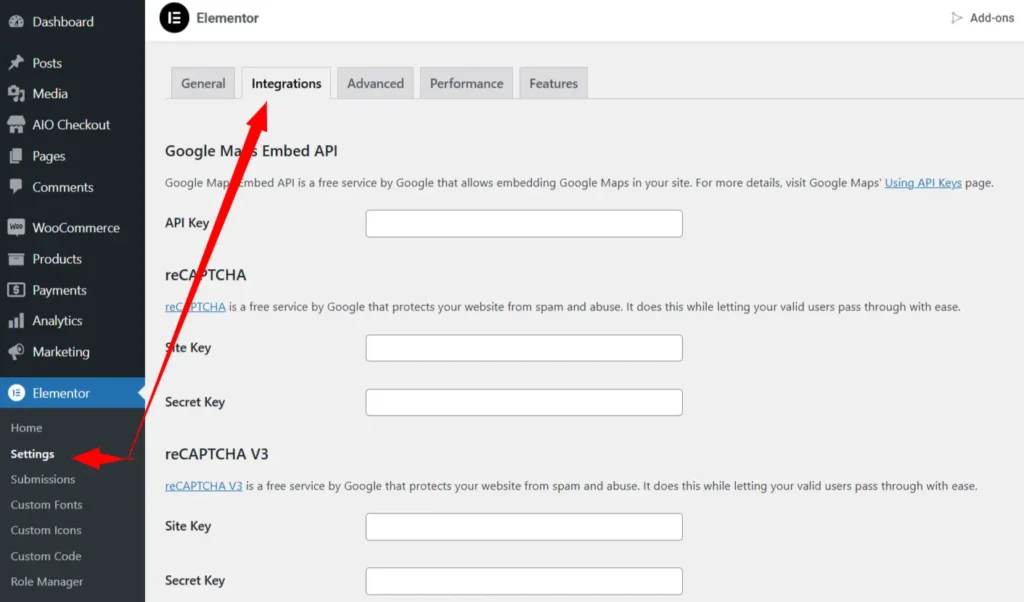
You will find the MailChimp placeholder where you have to paste in the API token and then hit Validate API. If there’s no error save the setting and now your website site is connected with MailChimp but not ready to send the form data.
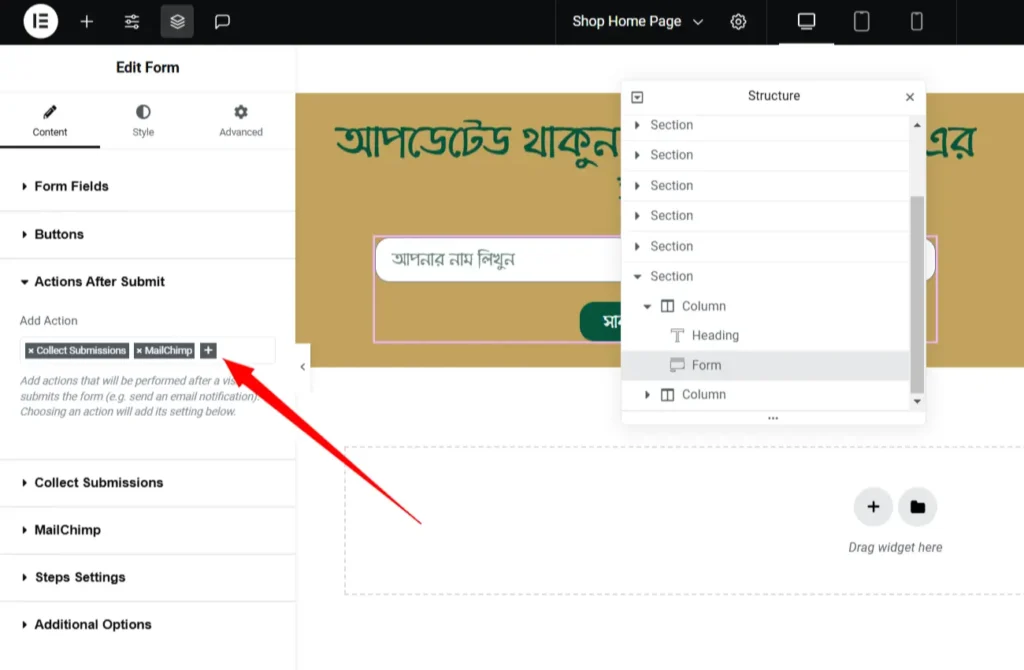
To send the User submitted information from your website form, you have to add a trigger in the section where your form element is placed in.
In the Form content settings you will find the option name Action After Settings, you have to use the (+) icon and select the option MailChimp from there. Note that these two options are good enough for a regular eCommerce or Blog website.
After doing the Add Action settings, you have to move on to MailChimp tab and there you must check those three settings with caution.
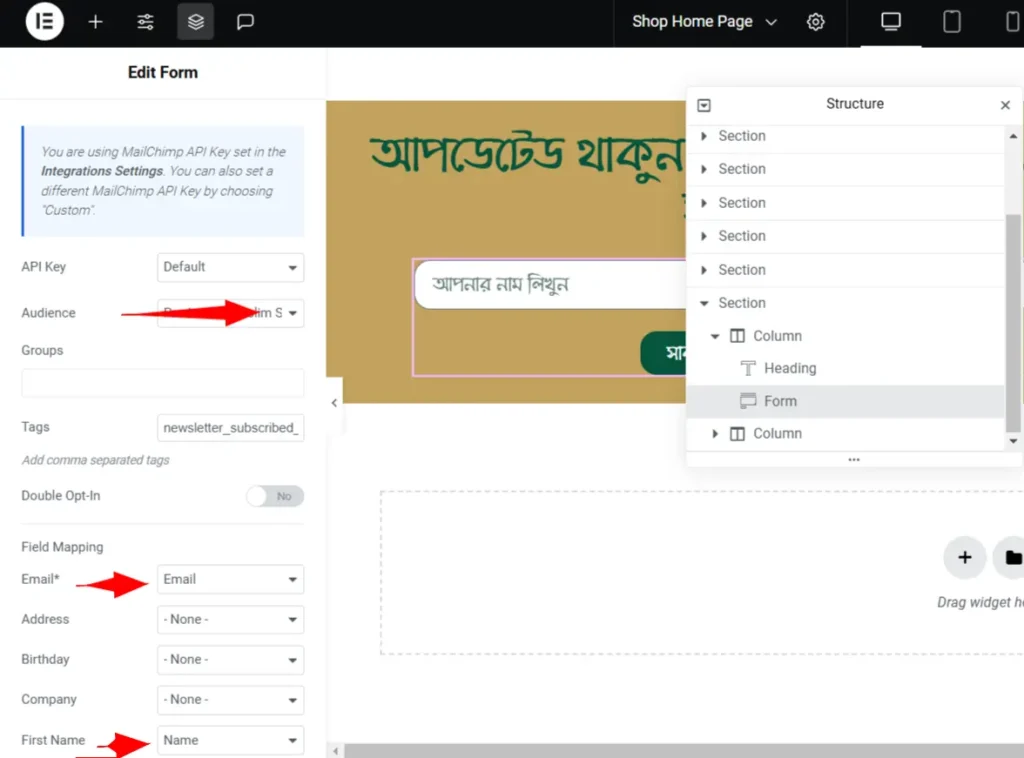
The API should be the default one but you can change your preferred MailChimp Audience. And in the Field Mapping section you should define the appropriate fields of your Elementor form.
In our case it’s just a newsletter where a user will submit their name and email so these settings were just fine.
If you test the Form in the front-end of your website, you should see your data is being stored in your MailChimp Audience. If NOT, please consider troubleshooting the problem again.
Tracking User Form Submission From Google Analytics using Google Tag Manager:
First of all, you should be aware that Elementor provides built-in form elements which can be used easily in an ecommerce or blog website. To Track the Form Submission let’s dive deeper into Elementor’s submit_success event initially.
Elementor forms automatically trigger a submit_success event after a form submission is successfully completed. This is the key reason why the script works without any additional configuration.
This code listens for this event (submit_success) and pushes a custom event (elementorFormSuccess) to the dataLayer once it is fired.
There are three steps to track these form_submission events in GTM.
- Use the Elementor base code in all pages of your website.
- Make a Trigger of Custom Events for elementorFormSuccess event.
- Create a Event Tag
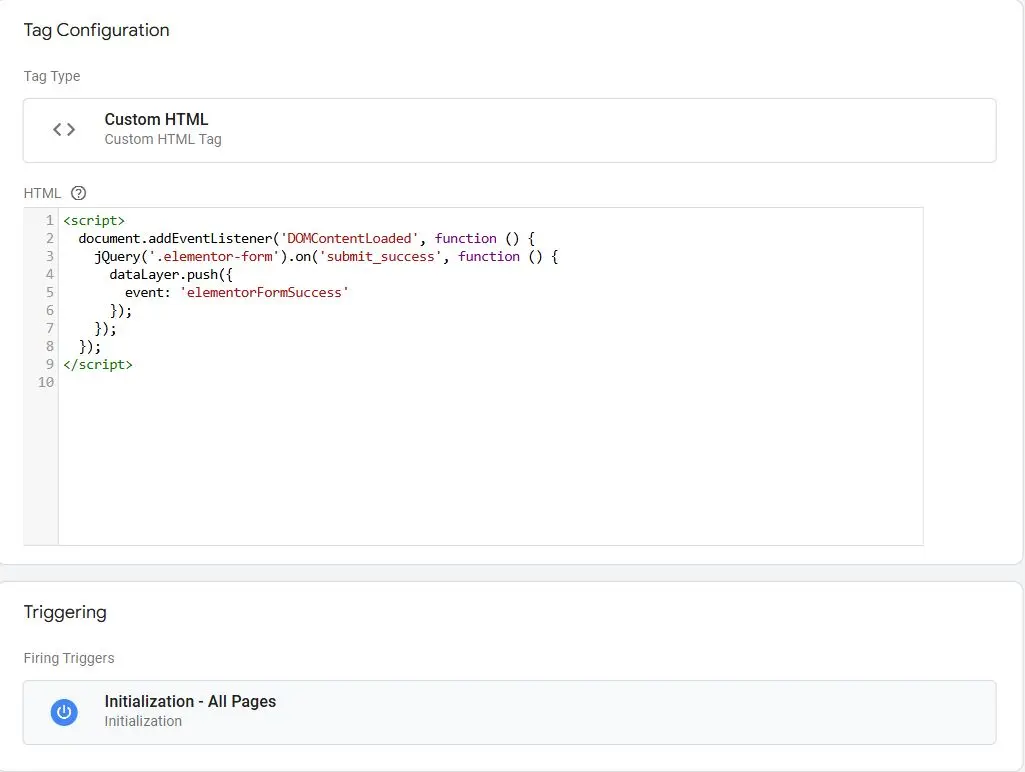
Step 01:
Here’s the base code you have to use to push an Elementor event into the default Elementor submit_success events. This is the default event triggered when a successful submission appears.
<script>
document.addEventListener('DOMContentLoaded', function () {
jQuery('.elementor-form').on('submit_success', function () {
dataLayer.push({
event: 'elementorFormSuccess'
});
});
});
</script>
Now from the Tag Manager create a HTML tag and paste in the code provide and use Initialization All Pages Trigger.
Note that this base code won’t work if ever changed the default Elementor Form settings like renaming the form name or button name or anything that relates to changes in Elementor default form settings.
In that case, you have to use an updated version of the base code in which the jQuery document root is called to define the dynamic form setting.
Here’s the Updated Base Code:
<script>
document.addEventListener('DOMContentLoaded', function () {
// Use event delegation to ensure this works even if forms are dynamically added
jQuery(document).on('submit_success', '.elementor-form', function () {
// Push event to the dataLayer when form submission is successful
dataLayer.push({
event: 'elementorFormSuccess'
});
});
});
</script>
Step 02:
Next you have to create a Trigger of custom events for the Form Submission event Tag.
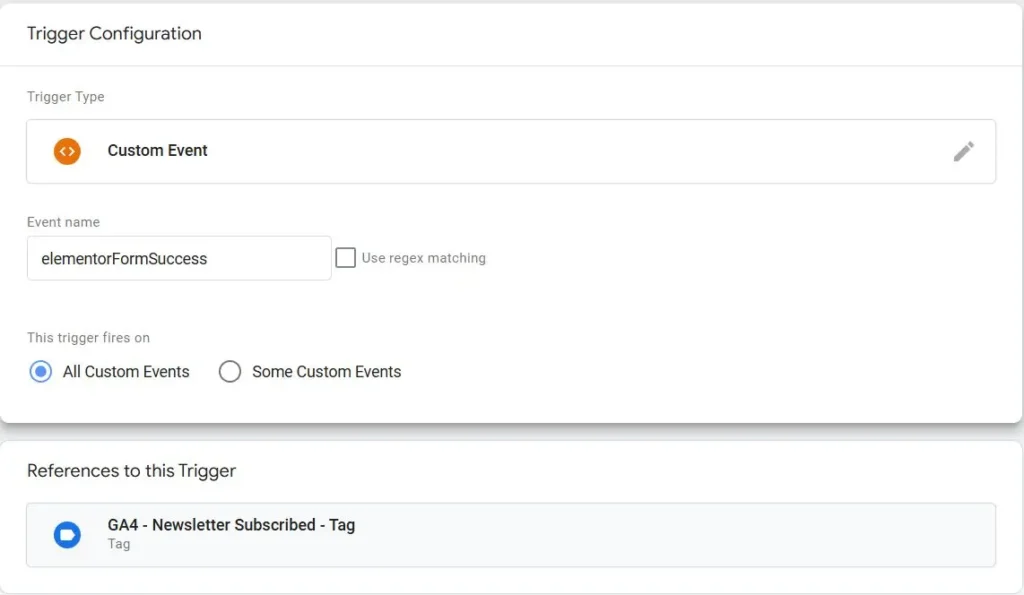
Step 03:
Now you have to connect this custom event trigger with a Form Submission Tag for your website.
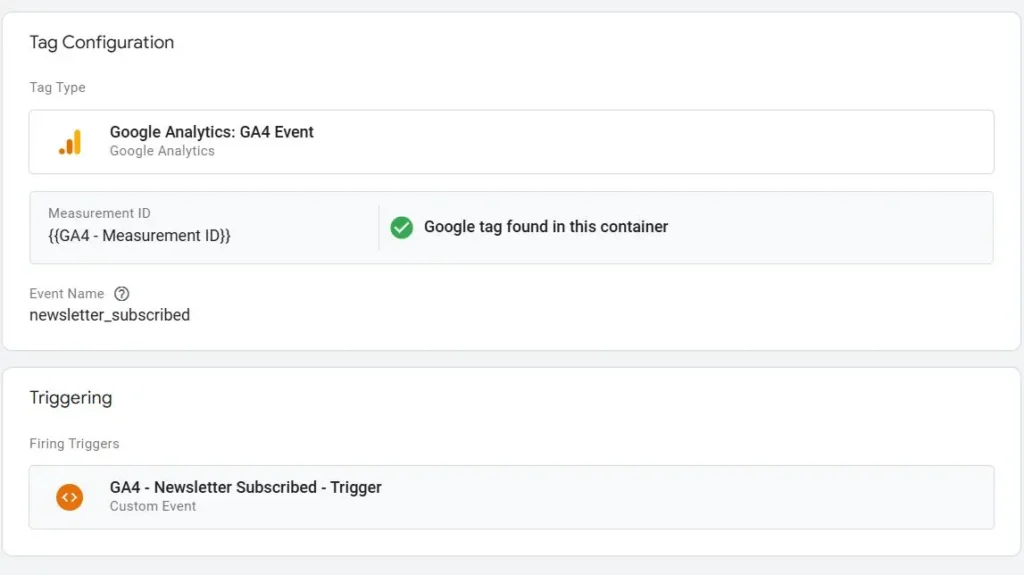
Save the Tag configuration and preview the Tag before publishing. If you have done the configuration accordingly, you should see the Tag has been fired like this:

And finally, it’s a good practice to check if the Tag manager is properly sending the event information to the site Google Analytics property as well. In our case, the tag was successfully sending the event data to the relevant GA property.
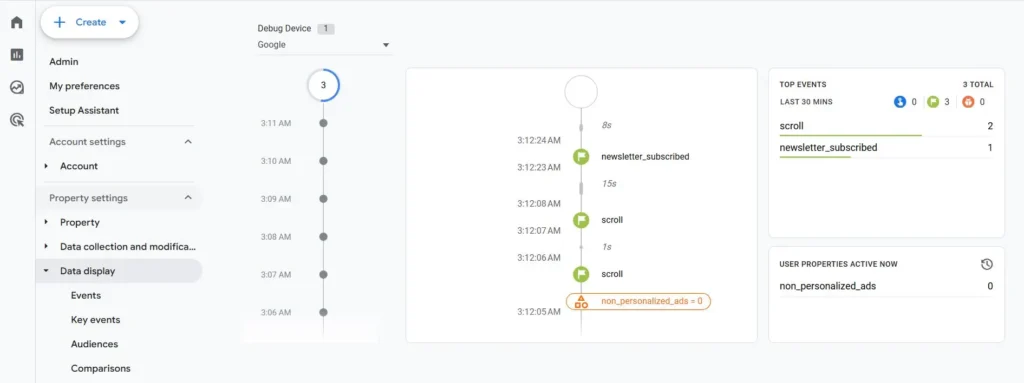
If things look perfect in yours, just hit publish in the GTM and it’s done. Sing like no one is listening……..!
